All about the Buttons
Ariane Coleman
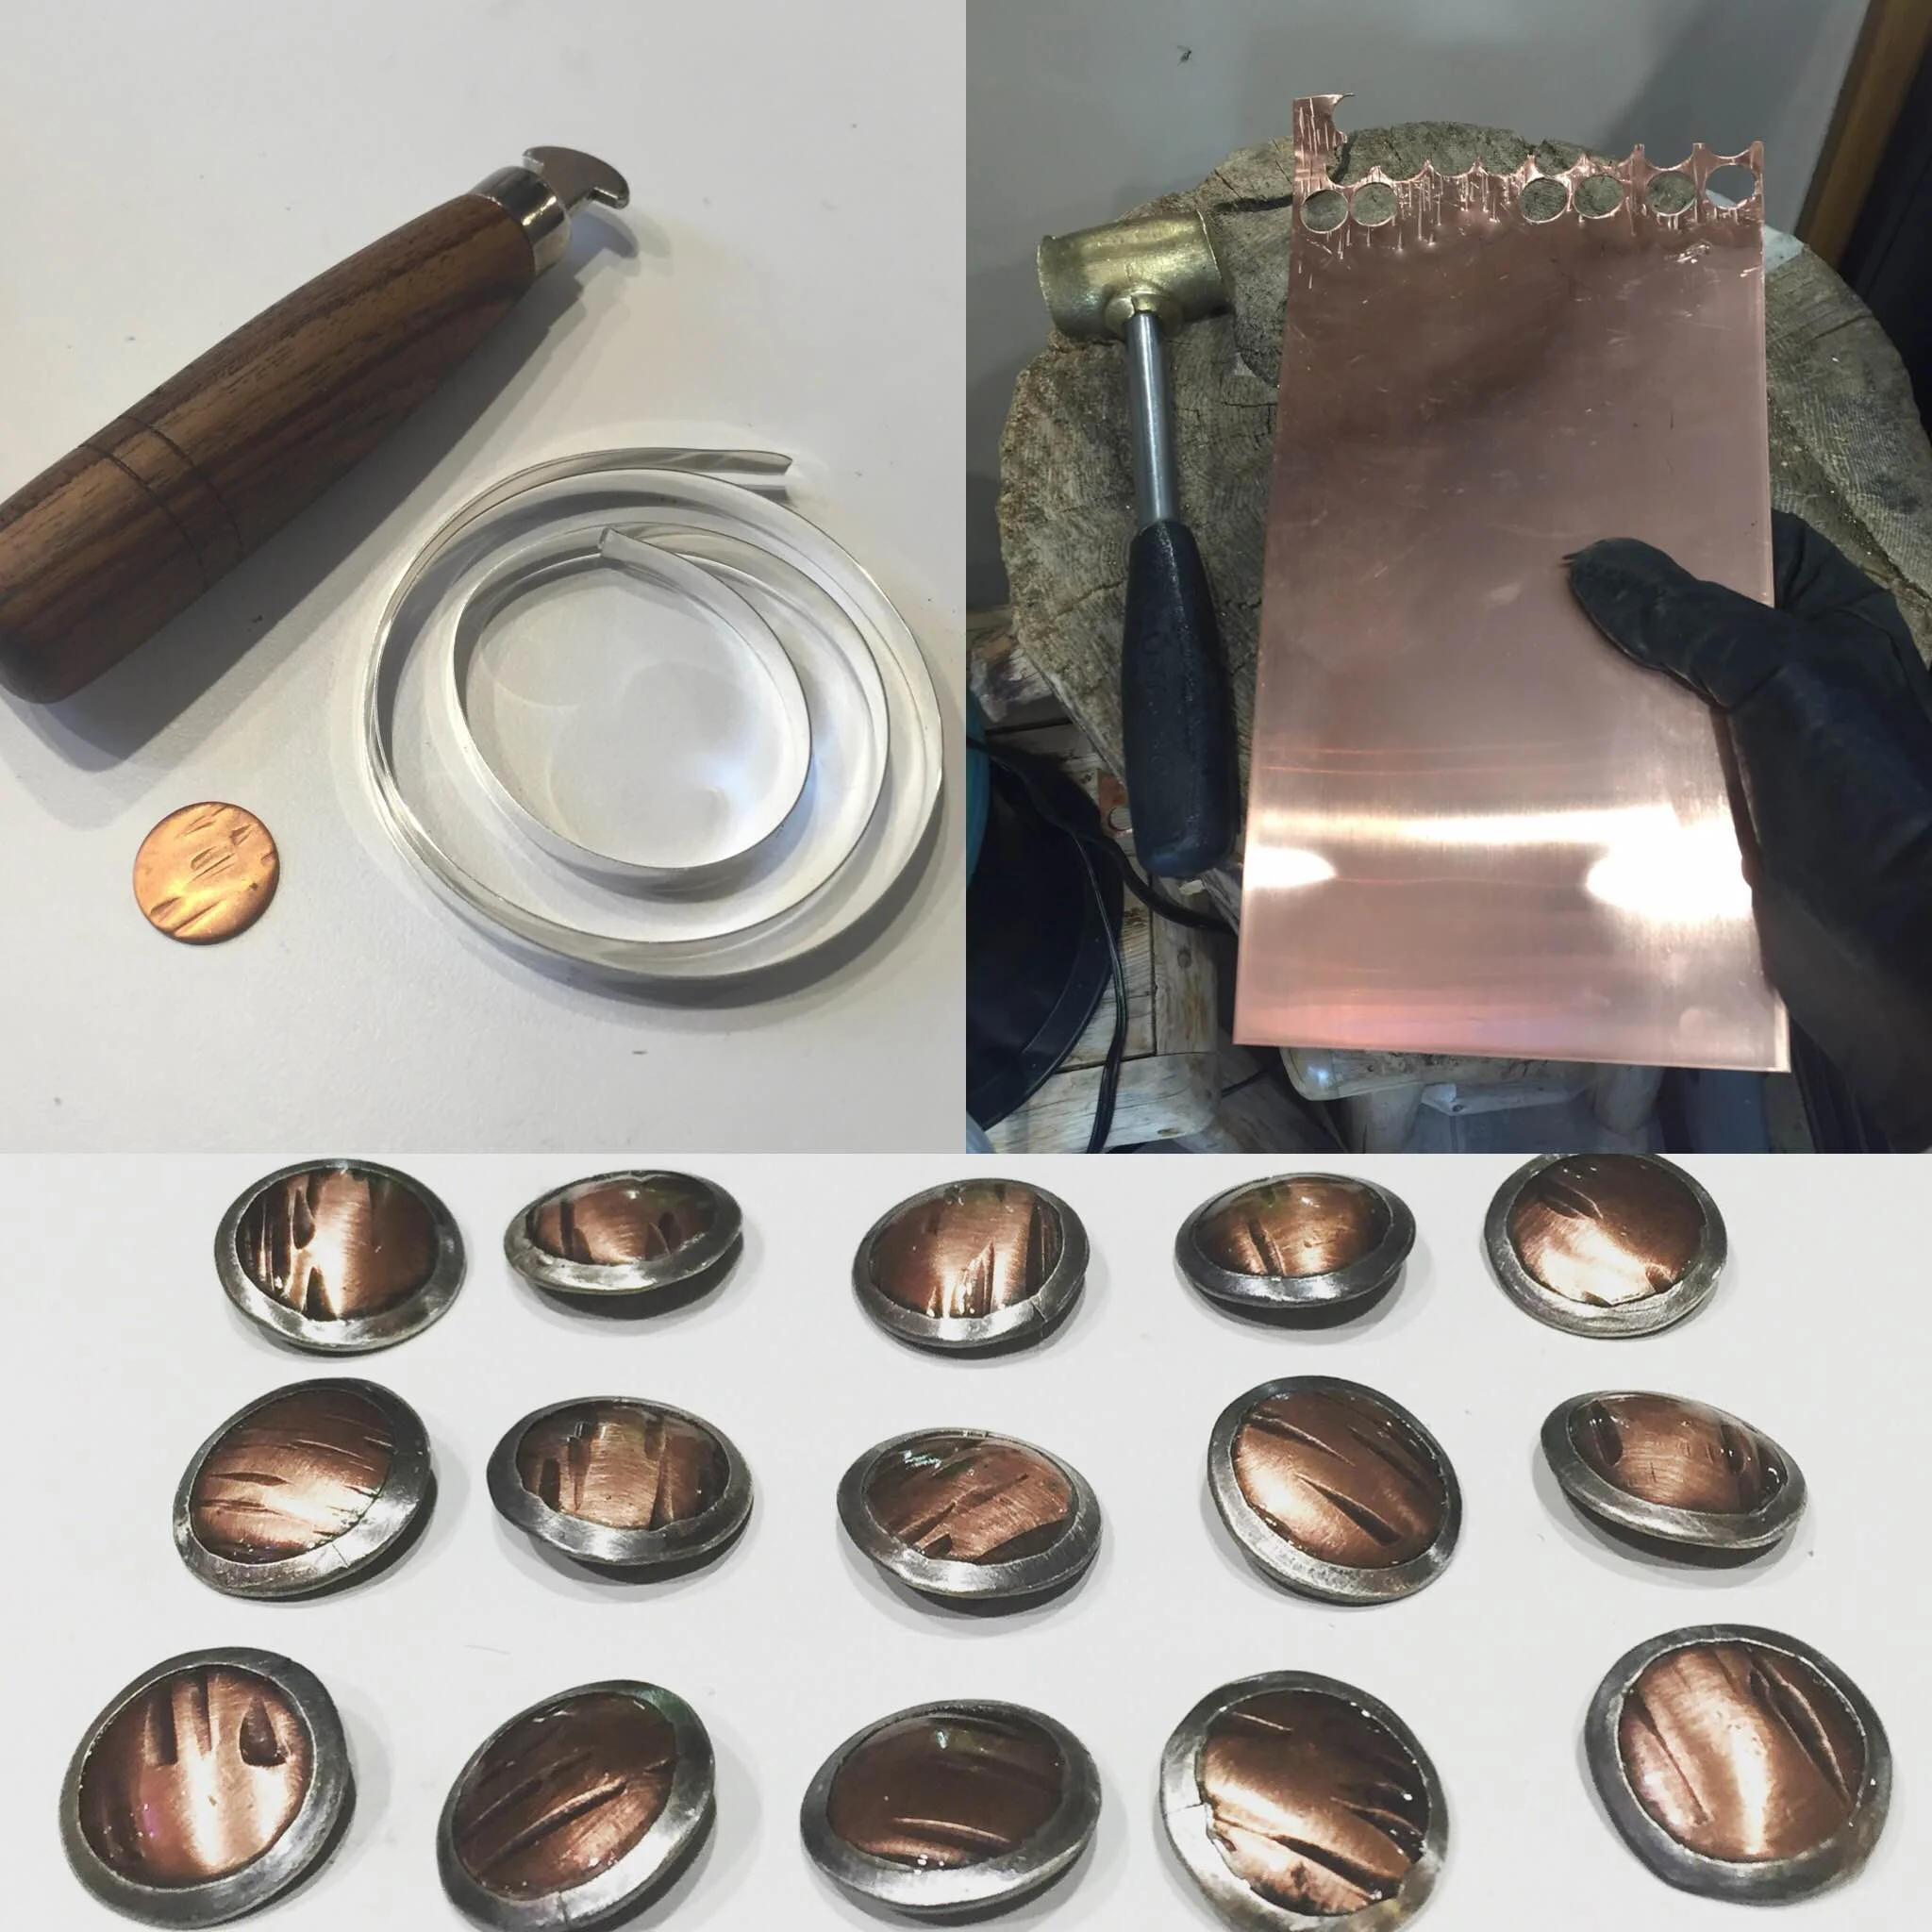
If you're a customer or have been into our shop, you'll be well aware that we make everything by hand on site in our little studio- right down to every single button that you'll spot on our wrap bracelets. You may not realize at first glance how much time and detail we put into everything we do, so we're going to give you an insider's take on the process and 18 steps it takes to create one of these unique buttons!
1.) Texture a plain sheet of copper with a hammer. This step leaves the unique little striations you see on the finished product.
2.) Punch out perfect circles with a disc cutter and a bronze hammer. This takes more muscle than you might expect, only Ariane can handle this step.
3.) Sand down the rough edges using a flex shaft and sanding drum- don't forget to wear your safety glasses!
4.) Make sterling silver bezels that hug the copper discs perfectly snug.
5.) Solder those bezels shut using the torch.
6.) Shape those bezels back to a perfect circle.
7.) Anneal the bezels with the torch. (heat them up to make the metal malleable again)
8.) Form. Fold one side of the bezel over the disc with a bezel roller. This leaves the bezel shaped like a little cup for the copper disc to sit in.
9.) Anneal the bezels again to make them easier to work with.
10.) Fold the other side of the bezel over and there you have a flat button with no patina (or finish on the metal)
11.) Dome the flat buttons. This again is a step that requires some muscle. You'll need your domed dapping block and your trusty bronze hammer. Hammer it with a dapper until it is at the desired amount of concave-ness.
12.) Cut the backs of the buttons out of sterling silver tubing using your jeweler's saw.
13.) Solder those little backs to the back of your buttons.
14.) Let them sit in the pickling pot where they get cleaned up a bit, then remove.
15.) Oxidize. For this step we use liver of sulfur (with a fan on of course) and it turns the whole button black.
16.) Steel wool. At this point we use steel wool to take off some off the black color on them, this step leaves black in the recessed areas which is precisely our goal.
17.) Wash. We use hot soapy water to ensure any black is totally adhered to the metal.
18.) Seal the deal. For the final step we coat the button with a sealant to make the life of the little button long and beautiful forever.
Everything that we make here at Ari O Jewelry is about the finer details, down to the small, extremely handmade buttons on our beaded wrap bracelets. We encourage you to come pay us a visit and see for your own eyes all of our unique jewelry we have to offer!
Here's a link to our Mineral Wrap Bracelet to see how one of these buttons makes itself right at home: http://www.ariojewelry.com/shop/bracelet